Table of Contents
- Freshwater Tank Solutions for Tiny Houses
- Understanding Tiny House Plumbing Mechanics
- Step-by-Step Guide to DIY Tiny House Plumbing
- Comprehensive Diagrams for Tiny House Plumbing Systems
- Selection of Water Tanks for Tiny Living Spaces
- Water Hookup Options for Tiny Houses
- Estimating the Cost of Installing Plumbing in a Tiny Home
- Effective Planning Strategies for Tiny House Plumbing Systems
- Conclusion
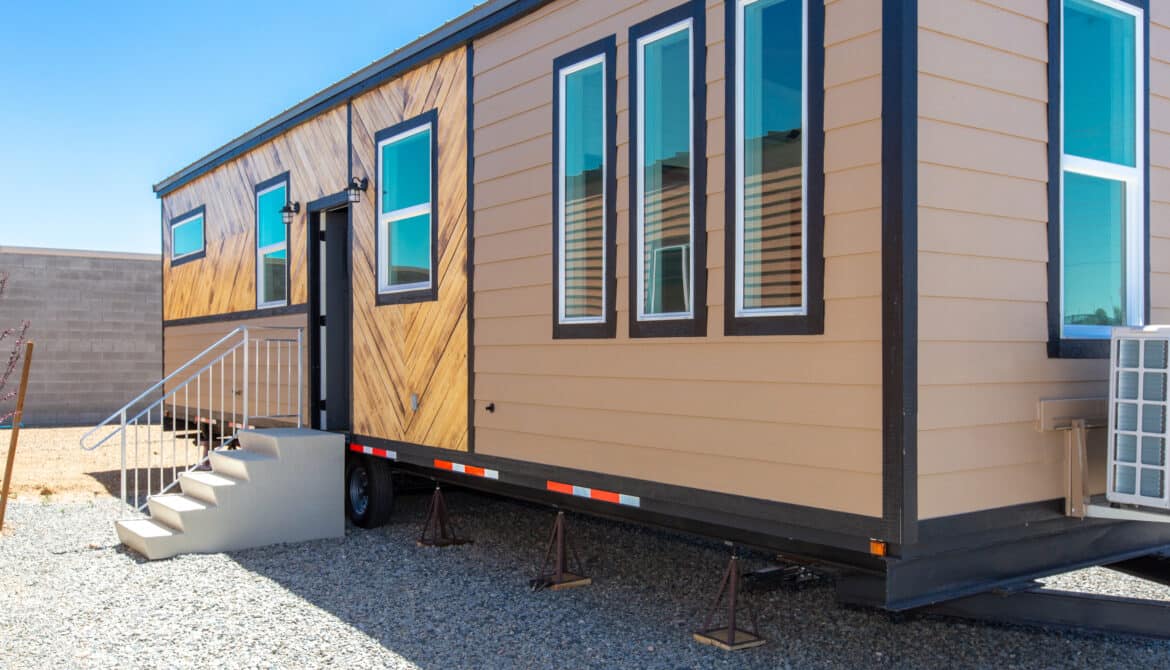
Ever wondered how tiny house enthusiasts tackle the challenge of water supply? With space at a premium, efficient water management becomes crucial, and that’s where the tiny house water tank steps in. This compact solution is key to maintaining a steady flow of life’s most essential resource. We’ll dive into the nuts and bolts of integrating a water tank into your trailer home, from connection strategies to planning for heat and demand. Whether it’s choosing the right location or figuring out which pipes and fittings will work best, understanding the ins and outs of tiny house plumbing ensures you’re never caught high and dry.
Innovative methods are reshaping how we think about water tanks in confined spaces. As we explore these advancements, take note: your way of living small doesn’t mean skimping on supply or convenience.
Freshwater Tank Solutions for Tiny Houses
In tiny homes, space is a premium, and water storage solutions must be smart and sustainable. We’ll delve into designs that save space, multifunctional tanks, and eco-friendly options.
Space-Saving Tank Designs
Tiny houses require innovative freshwater tank solutions. Traditional large tanks are not feasible due to limited space. Manufacturers have responded with creative designs.
Compact tanks can fit in tight spaces beneath floors or inside cabinets. Some are even designed to conform to the shape of the house’s contours. This maximizes every inch of available space.
Multi-Functional Tanks
A freshwater tank in a tiny home should do more than just store water. It can also serve as a piece of furniture or part of the home’s structure.
Tanks doubling as benches or tables are popular choices. They blend seamlessly into the living area while fulfilling their primary function. This dual purpose approach is practical and efficient.
Storage compartments can be built into these multi-functional tanks too. These hidden spaces keep essentials out of sight but within easy reach.
Eco-Friendly Water Tanks
Conserving resources is important in tiny house living. Eco-friendly water tanks help achieve this goal by reducing waste and promoting sustainability.
Rainwater harvesting systems collect natural precipitation for use in the home. These systems often include filtration for safe usage inside the tiny house.
Greywater recycling systems take wastewater from sinks and showers, then treat it for reuse in toilets or gardens. This significantly cuts down on water consumption.
Some freshwater tanks are made from recycled materials, further reducing their environmental impact. These materials often come from post-consumer products, giving them a second life as part of your home.
Understanding Tiny House Plumbing Mechanics
Tiny houses have unique plumbing systems, distinct from traditional homes. Key components and differences are critical to efficient water usage in these compact spaces.
Basics of Plumbing
The plumbing in a tiny house must be efficient due to space constraints. Pipes are often narrower and run a shorter distance. This setup is designed for minimal water waste and easy access for repairs.
Water enters through the main line, which connects to various fixtures. These include sinks, showers, and toilets. The system might also connect to a loading HE washer if present.
A freshwater tank stores the incoming water supply. This is especially important for homes that aren’t connected to municipal lines. Pumps help move water from tanks to fixtures when needed.
Key Water Components
Every component in a tiny house’s water system has its role. Here are some key parts:
- Freshwater Tank: It holds clean water for daily use.
- Pump: Ensures consistent water pressure throughout the home.
- Greywater Tank: Collects used water from sinks and showers.
- Blackwater Tank: Stores waste from toilets.
- Water Heater: Provides hot water on demand or stores it pre-heated.
These components work together to provide a seamless flow of water.
Traditional vs Tiny Plumbing
Tiny house plumbing differs significantly from that of traditional homes:
- Size: Everything is smaller, including pipes and tanks.
- Mobility: Many tiny homes must disconnect easily for transport.
- Resources: Tiny homes often rely on limited resources like rainwater collection or composting toilets.
Traditional systems have more room for larger heaters and can handle more wastewater due to bigger blackwater tanks.
In contrast, tiny houses may use eco-friendly alternatives like solar-powered heaters or greywater recycling systems.
Step-by-Step Guide to DIY Tiny House Plumbing
Planning Your Checklist
Before diving into the world of tiny house plumbing, it’s crucial to have a plan. This checklist is your roadmap.
Start by outlining every component needed for your tiny house water tank setup. Consider the size of your water tank, the type of pipes, and where they’ll run. Include a tiny house shower in your plan if you need one. Remember to account for both freshwater and wastewater systems.
Installation for Beginners
Installing plumbing in a tiny house can seem daunting. But with patience, anyone can do it.
Firstly, secure your water tank within close proximity to where you’ll need water most. This could be under the kitchen sink or near the bathroom area. Use sturdy brackets and straps to keep it in place during travel.
Next, connect the input pipe from an external water source to your tank. Ensure all fittings are tight to prevent leaks. From there, install pipes leading from the tank to various outlets like sinks and showers.
For hot water, install a compact water heater according to manufacturer instructions. Always prioritize safety when dealing with electrical components.
Troubleshooting Common Issues
Encountering problems during installation is normal. Stay calm and work through them systematically.
Leaks are common issues that arise during setup. Check all connections and use plumber’s tape on threads for extra sealant power if necessary.
If you experience low water pressure, inspect for any kinks in pipes or blockages that may be restricting flow.
Should you notice any odd noises coming from pipes or tanks, this could indicate air trapped within the system—open faucets slowly to allow air to escape naturally.
Comprehensive Diagrams for Tiny House Plumbing Systems
Visual guides and diagrams are essential for understanding the plumbing of a tiny house. They show how tanks, pipes, and fixtures connect in both typical and alternative setups.
Visual Plumbing Guides
A picture is worth a thousand words, especially. For anyone who has just tackled their own DIY tiny house plumbing from the previous section, visual aids can clarify complex concepts. These guides often include detailed illustrations of:
- Water system components.
- Drain line connections.
- Fixture placements.
They serve as invaluable references that ensure you correctly plumb your tiny house water tank and other elements.
Typical System Layouts
Every tiny house has unique needs, but there are commonalities in plumbing layouts. A typical system includes:
- Freshwater tank connected to the kitchen sink.
- Pipes leading from the water tank to bathroom fixtures.
- Drain lines directing waste to a septic or sewer system.
Understanding these basics through diagrams helps homeowners visualize their whole house plumbing before starting any work.
Alternative Setup Options
Not all tiny houses follow conventional paths. Some use composting toilets or greywater systems that require different setups. Diagrams illustrating these alternatives might show:
- Tanks bypassing traditional sewer lines.
- Filters or treatment systems for recycling water.
- Connections using regular hoses instead of permanent piping.
These variations cater to those looking for eco-friendly options or simpler installations.
Tank and Pipe Connections
The heart of any water system lies in its tanks and pipes. Diagrams break down this complexity by showing:
- The path from the main water source to each fixture.
- How ball valves control water flow throughout the system.
- The way drain lines remove waste efficiently.
Diagrams also highlight potential problem areas where leaks might occur if connections aren’t secure.
Fixtures Integration
Lastly, integrating fixtures like sinks and showers into your plumbing is crucial for functionality. Diagrams provide clear examples of:
- Proper pipe sizing for each fixture’s demand.
- The necessary steps to connect a kitchen sink without leaks.
- How shower installation affects the overall plumbing layout.
These visuals help ensure that once you turn on a tap, everything works as it should with no surprises.
Selection of Water Tanks for Tiny Living Spaces
Choosing the right water tank for a tiny house involves comparing materials, assessing capacities, and looking for specific features. These elements ensure that the water needs of tiny house residents are met without sacrificing space or quality.
Compare Tank Materials
Water tanks come in various materials like plastic, fiberglass, and metal. Each type has its pros and cons. Plastic tanks are lightweight and cost-effective but may not be as durable as metal ones. Fiberglass is robust and corrosion-resistant but can be more expensive. Metal tanks last longer but might need protection from rust.
Assessing Capacities
Tiny homes require less water than traditional houses. A typical tiny home might use a 100-gallon tank to meet daily needs including drinking, cooking, and bathing. Larger families or those wanting more autonomy might opt for a slightly larger tank.
Highlight Tank Features
When choosing a tank for your tiny house, consider these features:
- Size: It must fit within your available space; maybe under kitchen cabinets or in a loft.
- Insulation: Proper insulation keeps water at the desired temperature.
- Durability: Look for tanks made to withstand the rigors of tiny house movement.
- Maintenance: Easy-to-clean designs help maintain water quality.
Water Hookup Options for Tiny Houses
Choosing the right water hookup for a tiny house involves comparing permanent and portable solutions. It’s also essential to weigh the advantages and drawbacks of on-grid versus off-grid systems.
Permanent vs Portable
Permanent water hookups are fixed connections to a water source. These setups usually involve tapping into municipal lines or well systems. They provide a reliable flow of water but require professional installation. This option is ideal for tiny houses that remain in one spot.
Portable hookups, on the other hand, offer flexibility. You can use containers or tanks that you refill as needed. The portability allows movement without worrying about finding a new water supply each time you relocate your tiny house.
On-Grid vs Off-Grid
On-grid water sources are connected to public utilities or shared wells. They’re convenient because they offer consistent pressure and quality control from the provider.
However, being tied to the grid might come with monthly bills and less autonomy over your living situation. Off-grid options include collecting rainwater or sourcing from nearby lakes and streams, which can be filtered and pumped into your home.
Off-grid living provides independence but requires more maintenance. You’ll need to ensure your water is clean and safe for consumption.
Necessary Equipment
For any type of hookup, certain equipment is crucial:
- Water lines: These pipes carry water from its source into your tiny house.
- Water pump: A pump is essential in off-grid setups to move water from storage tanks into your plumbing system.
- Cold-water line: Separated from hot water lines, it ensures you have access to both temperatures.
- Filters: To purify collected or stored water before use.
- Heaters: To provide hot water when needed.
For permanent setups, you may also need:
- A meter pit
- Backflow preventers
- Underground piping
In contrast, portable systems might require:
- Flexible hoses
- Portable containers
- Manual transfer pumps
Each setup has its unique list of necessary gear depending on how complex or simple you want your system to be. PEX plumbing offers unmatched flexibility and cost savings for tiny house water systems. Its ease of installation makes it a favorite among DIY builders. PEX tubing is a game-changer in the world of plumbing, especially for tiny homes. Unlike traditional materials, PEX can bend around corners and obstacles with ease. This flexibility means fewer fittings and less chance of leaks. Moreover, PEX is tough. It resists corrosion, which can plague copper pipes over time. In freezing temperatures, it’s less likely to burst than rigid piping because it can expand and contract without breaking. Installing PEX is something many homeowners tackle themselves. It doesn’t require soldering like copper or gluing like PVC. Instead, connections are made with simple tools like crimpers or clamps. This simplicity speeds up the process and reduces labor costs. For tiny houses, where space is at a premium, the ability to quickly run PEX line through tight spaces is invaluable. When budget matters—and in tiny home construction, it often does—PEX plumbing shines bright. The materials are generally cheaper than copper or PVC when you consider the total cost of pipes and fittings. Also, since you can handle most installations without professional help, you save on labor expenses too. For small-scale projects like a tiny house water tank system, these savings add up fast. Plumbing installation costs can be significant. Smart budgeting and cost-saving strategies are essential. Materials make up a large portion of plumbing costs. Pipes, fittings, fixtures, and the tiny house water tank come with price tags. Labor is another big expense if you hire professionals. Costs vary depending on where you live and the complexity of your plumbing system. For a tiny home, these expenses might look different than for a traditional house. You’ll need fewer materials due to less space. But specialized compact designs can sometimes cost more per unit. Do-it-yourself (DIY) saves labor costs. If you’re handy, installing plumbing could be a weekend project. Learning from online tutorials or local workshops helps. Buying materials in bulk is cheaper. Look for sales at hardware stores or online marketplaces for deals on pipes and tools. Sometimes, recycled or gently used items work just as well without breaking the bank. Consider PEX piping mentioned earlier; it’s often more affordable than copper or PVC and easier to install yourself. Prioritize quality over quantity. It’s tempting to go for the cheapest options but investing in good-quality materials pays off long-term. For example, a durable tiny house water tank might cost more upfront but will last longer without needing repairs or replacement soon after installation. Look for warranties and guarantees when purchasing plumbing supplies. They provide peace of mind and protect against defects or early wear out. Proper planning is essential to avoid future plumbing issues in a tiny house. Consulting with experts and understanding legal requirements ensures a smooth setup. A tiny house water tank and the overall plumbing system require expert knowledge. It’s not just about connecting pipes. A professional can foresee problems you might miss. They know how to integrate systems efficiently, like ensuring your flush toilet has enough pressure. They also help select the right materials that last longer and work better in small spaces. Every area has its own rules about housing and plumbing. For tiny houses, these can be strict or lenient. Before you start, learn what’s legal in your location. This includes the size of your water tank or if you can have a flush toilet. Failing to comply could lead to fines or having to redo work. Detailed planning saves time and money later on. Think about every aspect of daily life in your tiny home: Answering these questions helps design a system that meets your needs without overcomplicating things. No system is perfect from day one. Wear and tear happen; leaks can occur. Design your plumbing so it’s easy to access for repairs or upgrades later on. Also, consider how changes in laws might affect your setup down the line. Tackling the water system in your tiny house is like piecing together a puzzle; it’s all about finding the right fit for your unique space. From freshwater tank solutions to PEX plumbing perks, we’ve dived deep into the nuts and bolts of tiny house plumbing. You’re now equipped with the know-how to choose the best water tanks, understand plumbing mechanics, and even DIY your way through installation—all while keeping an eye on costs. So, grab your tools and let’s make a splash! Your tiny home dreams are just a pipeline away. Ready to turn that trickle of an idea into a flowing reality? Share your journey with us and let’s keep the conversation flowing. Dive in, get your hands dirty, and remember—every drop counts in tiny living!
Flexibility and Durability
Easy Installation
Cost-Effectiveness
Estimating the Cost of Installing Plumbing in a Tiny Home
Typical Plumbing Expenses
Budget-Friendly Sourcing
Quality Without Overspending
Effective Planning Strategies for Tiny House Plumbing Systems
Consult With Professionals
Understand Legal Codes
Plan Thoroughly
Consider Future Issues
Conclusion